
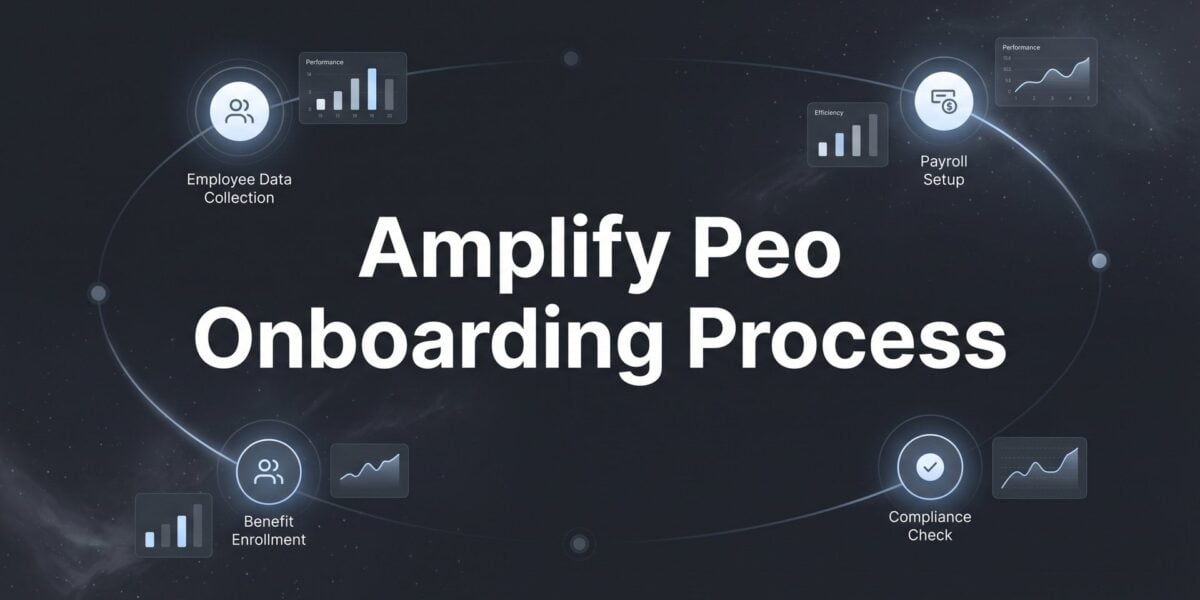
If you’ve already decided to move forward with Amplify PEO, the onboarding process is where that decision either pays off quickly or starts generating problems. Most business owners underestimate how much preparation falls on their side of the table. Amplify handles co-employment administration, payroll processing, benefits enrollment, and HR compliance — but none of that runs cleanly if your employee data is a mess, your team doesn’t know what’s happening, or your internal workflows aren’t aligned with how Amplify operates.
This guide walks you through the Amplify PEO onboarding process step by step, from the initial discovery call through your first live payroll run and into the first 90 days post-go-live. You’ll know what Amplify typically requires, what you need to have ready before each phase, where delays most commonly happen, and how to avoid the friction that drags most implementations off schedule.
One important note before we get into it: this guide assumes you’ve already made the decision to work with Amplify. If you’re still weighing providers, the steps below will give you useful context about what PEO onboarding actually involves — but you’d be better served starting with a broader provider comparison first.
Onboarding a PEO is a real operational shift. Done right, it frees up meaningful time and reduces compliance exposure. Done poorly, it creates payroll errors, employee confusion, and administrative headaches that take months to sort out. The steps below are designed to help you do it right.
Step 1: Complete the Discovery and Account Setup Phase
Every Amplify onboarding starts with a structured intake process — typically a discovery call or series of calls — where Amplify gets oriented to your business. This isn’t a formality. The information gathered here shapes your entire implementation timeline, so how prepared you are walking into it directly affects how smoothly everything downstream goes.
Before that first call, pull together the basics: your current employee headcount, pay schedules (weekly, biweekly, semi-monthly), existing benefits carriers and plan types, and whatever HR software or payroll system you’re currently running. Amplify will ask about all of it. Coming in without answers doesn’t make you look unprepared — it just delays the process by a week or two while you track things down.
During discovery, Amplify will also begin collecting the foundational legal and tax documents needed to establish the co-employment relationship. This typically includes your Federal EIN, state tax IDs for every state where you have employees, your current workers’ compensation policy details, and recent payroll records. Gather these before the kickoff call, not after. Businesses that treat discovery as passive information-gathering — assuming Amplify will guide them through document collection gradually — routinely lose two to three weeks right at the start.
You’ll be assigned a dedicated implementation specialist during this phase. That person is your primary point of contact through go-live, and the quality of that relationship matters. On your side, designate one internal owner for the onboarding process. This doesn’t have to be a full-time HR person — it can be an office manager or operations lead — but it needs to be one person with clear authority to gather information, make decisions, and respond to Amplify’s requests promptly. Onboarding by committee, where requests get forwarded around internally and no one owns the response, is one of the most reliable ways to blow your implementation timeline.
Success indicator: You leave the discovery phase with a documented implementation timeline, a named Amplify implementation specialist, and a clear list of documents and data your team needs to deliver — with deadlines attached.
Step 2: Gather and Submit Your Employee Data
If there’s one phase that consistently determines whether a PEO onboarding runs on schedule or gets stuck, it’s this one. Employee data collection is the most common bottleneck across every PEO implementation, and Amplify is no exception.
Amplify will need complete, accurate records for every employee being brought into the co-employment relationship. That means legal names (not nicknames), Social Security numbers, current mailing addresses, pay rates, job titles, employment type (full-time vs. part-time), hire dates, and I-9 verification status. For hourly employees, you’ll also need to provide standard hours and any applicable overtime policies.
Workers’ compensation classification codes deserve particular attention here. When your employees move onto Amplify’s master workers’ comp policy, each employee gets assigned a classification code that corresponds to their job function. Those codes directly affect the rate applied under the master policy. If you misclassify employees at this stage — grouping an office administrator under a field labor code, for example, or vice versa — you’ll either overpay or create an audit exposure down the line. Review job roles carefully before submitting, and if you’re uncertain about a classification, ask your Amplify rep to walk you through it.
If your workforce includes a mix of W-2 employees and 1099 contractors, clarify upfront which workers are being brought into the co-employment relationship. Generally, 1099 contractors are excluded from PEO co-employment arrangements. This distinction matters for headcount, benefits eligibility, and workers’ comp coverage — so get it sorted before data submission, not after.
Amplify typically provides a secure portal or structured template spreadsheet for data submission. Use it. Do not email sensitive employee data through regular channels. Beyond the security risk, it creates version control problems that slow down verification. Understanding the full scope of PEO data migration before you begin can help you anticipate what’s involved and avoid common errors.
The most common pitfall at this stage is outdated records. Employees who’ve moved and haven’t updated their address, name changes that weren’t reflected in your system, pay rates that haven’t been updated since a raise was processed informally — these all create errors downstream in payroll and benefits enrollment. Run a quick audit of your employee records before you submit anything. It’s tedious, but catching a discrepancy now is far less painful than chasing a payroll error after go-live.
Success indicator: All employee records are submitted, verified, and confirmed accurate by Amplify before you move into benefits enrollment. Don’t advance this phase until you have that confirmation in writing.
Step 3: Navigate Benefits Enrollment Setup
Benefits enrollment setup has two distinct components that business owners sometimes conflate: the plan selection decisions you make as the employer, and the enrollment actions your employees need to complete individually. Both have to happen on schedule, and both require active management on your part.
On the employer side, you’ll work with Amplify to select which benefit tiers you want to offer — typically health, dental, vision, life, and various ancillary options through Amplify’s master plan — and set your employer contribution levels. These contribution decisions matter beyond just employee satisfaction. The rates you commit to here directly affect your per-employee PEO cost going forward, so understand what you’re agreeing to before you finalize anything. If the numbers feel unclear, ask Amplify to walk you through the total cost impact before you lock in.
If you’re transitioning employees off an existing group health plan, coverage timing is critical. You need to know exactly when your current plan’s coverage ends and when Amplify’s coverage begins. A gap of even a few days creates real liability — if an employee has a medical event during that window, you’re exposed. This is one of the more common and more expensive mistakes businesses make during PEO onboarding. Coordinate the cancellation of your existing plan carefully, and confirm the effective dates of Amplify’s coverage in writing before you notify your current carrier.
On the employee side, most employees will complete their own enrollment through Amplify’s employee portal. Your role is to communicate the enrollment window clearly and make sure employees actually complete it on time. Employees who miss the enrollment window are typically locked out until the next open enrollment period — which could be months away. To protect against this, set an internal deadline several days before Amplify’s actual cutoff. That buffer gives you time to chase down stragglers without missing the hard deadline.
Employees declining coverage should document their waiver formally. Don’t let verbal declines slide through without a paper trail. Amplify will typically have a waiver process built into the portal — make sure employees who are opting out actually complete it rather than just not logging in. How other PEOs handle this process is worth understanding; the Paychex PEO onboarding process offers a useful point of comparison for benefits enrollment workflows.
Success indicator: All eligible employees have completed enrollment or submitted documented waivers, and you have written confirmation from Amplify of coverage effective dates for every plan selected.
Step 4: Configure Payroll and Run a Parallel Test
Payroll configuration is where implementation errors stop being administrative inconveniences and start becoming real money problems. This phase requires close collaboration with your Amplify implementation specialist, and it’s worth slowing down here to get it right rather than rushing toward go-live.
The configuration work involves mapping your pay codes, deduction types, PTO accrual rules, and overtime policies into Amplify’s system. If your current payroll setup has any quirks — a custom PTO policy, a non-standard pay period, a bonus structure with specific tax treatment — flag those upfront. Assume nothing migrates automatically or correctly. Every configuration point should be verified explicitly.
If your business runs multiple pay schedules — biweekly for hourly staff and semi-monthly for salaried employees, for example — confirm exactly how each schedule is handled within Amplify’s system before go-live. Multi-schedule setups are manageable, but they require deliberate configuration and clear internal documentation so your team knows the correct submission deadlines for each group.
If Amplify offers the option of a parallel payroll run, take it. Running your existing payroll and Amplify’s first payroll simultaneously for one cycle lets you compare outputs and catch discrepancies before you’ve fully cut over. Not every PEO offers this, and it adds some administrative effort, but for businesses with more than a handful of employees it’s worth the ask. Setting up direct deposit through Amplify PEO correctly before the first live run is one of the details that’s easy to overlook but critical to get right.
Multi-state businesses face the most complexity during this phase. State tax withholding setup needs to be verified for every state where you have employees — not just your primary state. Withholding errors in secondary states are a common source of post-go-live problems that can take multiple payroll cycles to fully correct. Flag your full list of operating states early in this phase and confirm each one explicitly.
Before the first live payroll run, Amplify should produce a pre-processing payroll register for your review. Don’t skim it. Verify it line by line against your own records, particularly for any employees with non-standard pay arrangements, recent pay changes, or deductions that were recently modified. This is your last clean opportunity to catch errors before money moves.
Success indicator: You’ve reviewed and approved the pre-processing payroll register, all pay codes and deductions are mapped correctly, and your first live payroll run produces results that match your expectations without requiring retroactive corrections.
Step 5: Establish HR Compliance and Policy Alignment
Co-employment creates a division of HR responsibilities between you and Amplify that isn’t always intuitive. Amplify assumes certain employer-of-record responsibilities — typically around payroll tax compliance, workers’ comp coverage, and benefits administration — but you retain operational control over your employees’ day-to-day work, performance management, and business-specific policies. The line between those two domains needs to be explicitly documented during onboarding, not assumed.
Amplify typically provides an employee handbook template or an updated version of your existing handbook as part of onboarding. Review it carefully. Generic PEO handbook templates are designed to cover a broad range of businesses, which means they may not reflect your industry-specific requirements, your state’s specific employment law mandates, or the particular policies that matter to your workforce. Understanding exactly what Amplify PEO’s employee handbook support includes — and where it falls short — will help you identify gaps before they become compliance problems.
If you operate in states with more complex employment law environments — California, New York, Illinois, Washington — confirm explicitly that Amplify’s compliance framework covers the specific requirements in those states. Paid leave laws, predictive scheduling requirements, pay transparency rules, and local ordinances vary significantly and change frequently. Don’t assume a national PEO’s standard template has accounted for all of it. Ask directly, get confirmation in writing, and document which compliance obligations Amplify owns versus which remain your responsibility.
Workers’ comp transitions onto Amplify’s master policy during this phase. Coordinate the cancellation of your existing workers’ comp policy carefully to avoid paying for duplicate coverage during the overlap period. Confirm the exact effective date of Amplify’s coverage and time your existing policy cancellation accordingly.
This is also the right moment to establish the HR support structure for your managers. Who contacts Amplify when there’s an employee relations issue? What’s the escalation path for a situation that requires legal input? Make sure your managers know the process before they need it, not when they’re in the middle of a difficult situation and improvising.
Success indicator: Your team has a clear, documented map of HR responsibilities — what Amplify handles, what you handle — your handbook is updated and distributed, and compliance obligations for all operating states are confirmed in writing.
Step 6: Communicate the Transition to Your Employees
Employee communication is the most consistently underprioritized step in PEO onboarding. Business owners focus heavily on the administrative and compliance work — which is understandable — but then send a brief email to employees the day before go-live and wonder why their inbox fills up with confused questions on the first payday.
Your employees are going to notice changes. Their pay stub will look different. They’ll receive paperwork from a company they’ve never heard of. Their benefits portal will be new. Their W-2 at year-end will come from a different entity. If you haven’t explained any of this in advance, the natural reaction is anxiety — and anxious employees generate a lot of unnecessary HR support burden.
Send a clear, plain-language communication to all employees before go-live. It doesn’t need to be long, but it needs to cover the basics: what a PEO is in simple terms, why you’re making this change, what employees will notice differently (pay stub format, benefits portal, W-2 source), and who to contact if they have questions. Avoid corporate language. Write it the way you’d explain it in a team meeting.
Brief your managers separately and in advance. They’ll be the first line of questions from employees, and they need enough context to answer basic questions without escalating everything to you or to Amplify’s support line. A short manager FAQ covering the most common employee concerns goes a long way. How other providers approach this communication challenge is worth reviewing — the TriNet PEO onboarding process offers a practical comparison for how employee transitions are typically managed.
Address the co-employment question directly in your communication. Employees sometimes interpret a PEO transition as a sign that their employment situation is changing in a significant way — that they’re being outsourced, or that their relationship with your company is shifting. Clarify clearly that their day-to-day employment relationship with you doesn’t change. They still report to you. Their job isn’t changing. The administrative back-end is what’s moving.
Give employees at least one to two weeks of notice before go-live. That’s enough time for questions to surface and get answered before the first payroll run, and enough time for employees to complete their portal setup and benefits elections without feeling rushed.
Success indicator: Employees have completed their portal setup and benefits elections before the deadline, and your first Amplify payroll run doesn’t generate a significant spike in employee complaints or confusion about their pay.
The First 90 Days: What Active Management Actually Looks Like
Go-live is not the finish line. Businesses that treat it as one tend to discover problems at quarter-end — in the form of billing discrepancies, payroll errors that accumulated quietly, or compliance gaps that nobody caught because the monitoring stopped after the first paycheck processed.
Plan for structured check-ins with your Amplify rep at 30, 60, and 90 days post-go-live. Use those touchpoints to review payroll accuracy, address any employee issues that have surfaced, and confirm that your invoices match what was quoted. PEO invoices can be complex, and errors do occur — particularly in the first few billing cycles when configuration is still settling. Track your actual per-employee costs against your quoted rates in the first two to three payroll cycles and flag any discrepancy immediately rather than letting it accumulate.
Establish a clear internal process for employee changes — new hires, terminations, pay adjustments, address updates — so your team knows the correct workflow through Amplify’s system. Old habits die hard. People who processed payroll changes directly in your previous system will default to doing the same thing, bypassing Amplify’s process and creating data inconsistencies. Document the new workflow and communicate it explicitly.
If something isn’t working — a payroll error, a benefits issue, a compliance question that isn’t getting answered — document it formally and escalate through the appropriate channel. PEO relationships that drift toward informal problem-solving tend to get expensive. Keep a written record of issues raised and resolutions received.
Here’s a quick checklist covering the full onboarding arc:
Discovery and Account Setup: Designate an internal onboarding owner. Gather EIN, state tax IDs, workers’ comp policy details, and current payroll records before the kickoff call. Leave with a documented timeline and named Amplify contact.
Employee Data Submission: Audit existing employee records for accuracy before submitting. Confirm workers’ comp classification codes. Clarify which workers are included in the co-employment relationship. Use Amplify’s secure portal for all data submission.
Benefits Enrollment: Confirm coverage effective dates to avoid gaps. Set an internal enrollment deadline several days before Amplify’s cutoff. Document waivers for employees declining coverage.
Payroll Configuration: Verify all pay codes, deductions, and accrual rules explicitly. Request a parallel payroll run if available. Review the pre-processing payroll register line by line before go-live.
HR Compliance Alignment: Document the division of HR responsibilities between you and Amplify. Review the handbook template against your current policies and state-specific requirements. Coordinate workers’ comp policy cancellation timing.
Employee Communication: Send plain-language notice at least one to two weeks before go-live. Brief managers separately. Address co-employment directly to prevent confusion.
Post-Go-Live Monitoring: Schedule 30/60/90-day check-ins. Verify invoices against quoted rates. Establish internal workflows for employee changes.
Making Sure You’re With the Right Provider
Preparation on your side is what determines whether Amplify onboarding goes smoothly. Amplify’s implementation team can only work as fast as your data, your decisions, and your internal communication allow. The businesses that get through onboarding in a clean, predictable timeline are the ones that treat it as an active project with clear ownership — not a handoff to the PEO to figure out.
If you’re still evaluating whether Amplify is the right fit before committing to this process, it’s worth taking a step back. Onboarding is a meaningful investment of time and organizational energy, and switching providers after a bad implementation is significantly more disruptive than choosing carefully upfront.
If you want an independent look at how Amplify compares to other PEO providers on pricing, services, and contract structure, compare your options before you sign. Most businesses overpay due to bundled fees and administrative markups that aren’t obvious until you know what to look for. Getting a clear picture of what you’re actually paying — and what you’d pay elsewhere — is worth the time before you commit to a multi-year relationship.