Signing a TriNet contract is one thing. Actually getting your company onboarded — payroll migrated, benefits enrolled, employees set up in the platform — is where the real work starts. And for most business owners, this is the part that catches them off guard.
TriNet’s onboarding process is more structured than many mid-market PEOs. That can work in your favor, but only if you come prepared. If you show up to kickoff with incomplete employee data, unclear timelines, or no plan for employee communication, you’ll feel that friction immediately.
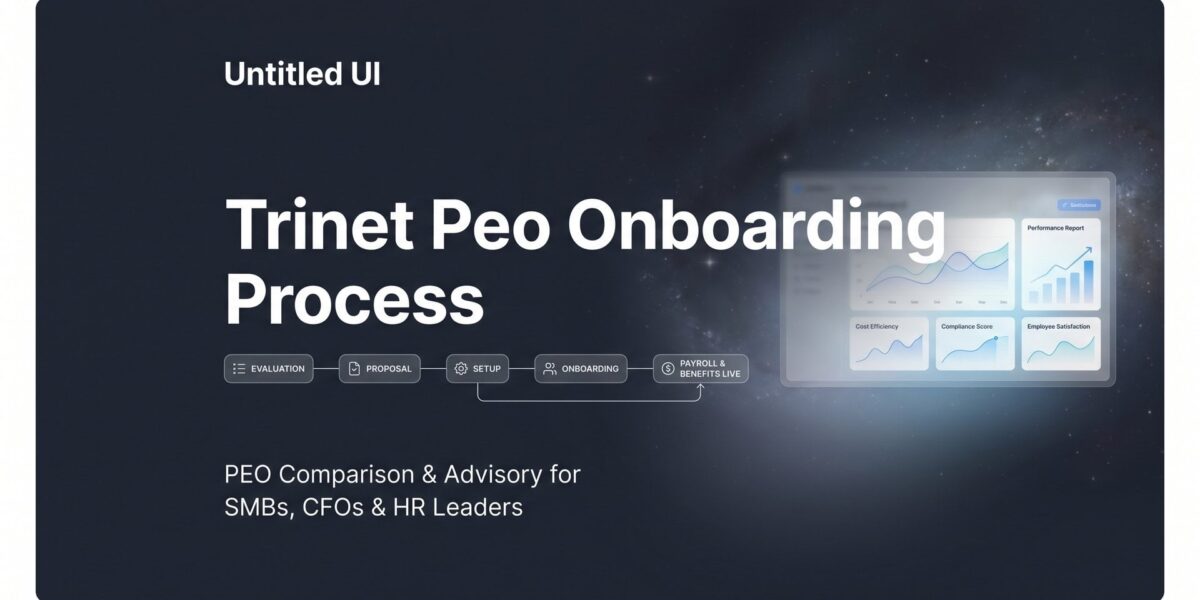
This guide walks you through what to expect at each stage of TriNet’s onboarding: what you need to have ready, where the common slowdowns happen, and how to avoid the mistakes that delay go-live dates or create payroll headaches in your first quarter.
A few things worth noting upfront. TriNet operates on a co-employment model with bundled benefits organized by industry vertical. Their onboarding is more standardized than smaller regional PEOs, which means less customization but more predictability. Multi-state employers face additional complexity due to state-level tax registrations and compliance requirements. And TriNet is generally better suited for companies with 10 to 200-plus employees — if you’re below that range, the platform may feel like more overhead than it’s worth.
This isn’t a promotional walkthrough. It’s a practical, experience-informed breakdown for business owners and ops leaders who want to understand the operational lift before (or right after) they commit. If you’re still evaluating whether TriNet is the right fit, our broader PEO comparisons hub can help you assess alternatives side by side. This guide assumes you’ve already selected TriNet or are deep in the evaluation phase and want to know what you’re actually signing up for.
Step 1: Gather Your Company Data and Employee Records Before Kickoff
The single biggest predictor of a smooth TriNet onboarding isn’t your company size or complexity. It’s how clean and complete your data is when you show up to kickoff.
TriNet’s implementation team works from structured templates. They’re not going to manually piece together your payroll history from a spreadsheet you exported from QuickBooks at midnight. If the data isn’t clean and organized, the process slows down — and the go-live date slips.
Here’s what TriNet typically requests upfront:
EIN verification and state registrations: You’ll need to confirm your federal Employer Identification Number and provide documentation for any states where you have employees. If you have workers in states where you’re not currently registered as an employer, that needs to be resolved before TriNet can set up payroll tax accounts there.
Current payroll history: Year-to-date wage data, tax filings, and any prior payroll provider records. If you’re mid-year, this becomes critical for accurate tax liability transfers. Missing or incomplete YTD data is one of the most common causes of first-payroll errors.
Workers’ compensation history: Your experience modification rate (EMR) and recent claims history. TriNet provides master policy coverage, but your history still affects how your account is priced.
Employee census data: For every employee, you’ll need name, Social Security number, date of birth, salary or hourly rate, job title, work location (including state), and current benefit elections. This is where most companies underestimate the work involved.
The multi-state issue deserves extra attention. Companies with employees in several states often assume TriNet handles all the state-level setup automatically. TriNet does manage the filings, but they need your cooperation to do it. Each state has different registration requirements and timelines, and if your employee data doesn’t clearly identify which state each person works in, those registrations get delayed. Understanding TriNet’s payroll services and how they handle multi-state filings can help you prepare for this complexity.
One practical tip: ask TriNet for their data collection templates during the sales process, before you sign. Most sales reps will share them. Getting those templates early lets you start gathering and cleaning your data in parallel with contract negotiations, which can shave one to two weeks off your overall timeline.
If you’re coming from another PEO, request a formal data export from your outgoing provider as soon as you know you’re switching. The sooner you have that data, the sooner you can audit it for gaps.
You’ll know you’re ready for this step when you can fill out every field in TriNet’s census template without leaving blanks or writing “TBD.”
Step 2: Align on Your Go-Live Date and Build a Realistic Timeline
TriNet’s onboarding typically runs four to six weeks from signed contract to first payroll. That range exists for a reason. A 15-person company in one state with straightforward benefits can often hit the shorter end. A 75-person company spread across eight states with complex benefits and a mid-year transition is looking at the longer end — or beyond it.
The go-live date conversation needs to happen early, and it needs to be grounded in reality, not optimism.
Mid-quarter and mid-year transitions create extra work that’s easy to underestimate. YTD payroll data migration becomes more complex. Tax liability transfers require more reconciliation. Benefits plan alignment gets messier when you’re not starting at a natural renewal point. None of this is impossible, but it adds time and increases the risk of first-cycle errors.
If you have any flexibility in timing, starting at the beginning of a quarter — or ideally January — simplifies the transition meaningfully. Payroll history is cleaner, tax accounts start fresh, and benefits enrollment aligns with natural plan year timing. Not every company has that flexibility, but it’s worth considering if you do.
Coordinating with your outgoing payroll provider or PEO is critical here. You need to manage the cutover carefully to avoid two things: double-filing (where both your old and new providers file payroll taxes for the same period) and gaps in tax deposits (where neither provider files because each assumed the other would). If you’re curious how a competing PEO handles this same transition, the ADP TotalSource payroll tax filing breakdown offers a useful comparison point.
Get explicit confirmation from your outgoing provider about when their last payroll run will be and what data they’ll provide for the transition. Don’t assume they’ll volunteer this information proactively.
Before you move to the next step, make sure you have three things confirmed in writing: a specific go-live date, a named implementation manager at TriNet, and a shared project timeline with milestones. If TriNet hasn’t assigned you an implementation manager yet, ask. Vague commitments about timelines are a warning sign that the process isn’t as organized as it should be.
Step 3: Work Through Benefits Plan Selection and Employee Communication
TriNet uses a bundled benefits model. This is one of the defining characteristics of their service, and it’s worth understanding clearly before you get deep into onboarding.
Your benefits options are organized by industry vertical and company size. You’re not building a fully custom benefits package from scratch. You’re choosing from TriNet’s pre-negotiated plan options — medical, dental, vision, 401k, and supplemental coverage — within the framework they’ve already established for your segment. For many companies, this is fine. For companies with very specific benefits requirements or employees accustomed to premium plan options, it can create friction.
The practical implication: review TriNet’s available plan options for your industry early in the process, before your employees hear anything about the transition. If you’re still weighing whether TriNet’s bundled approach is the right model for your team, our breakdown of TriNet PEO pros and cons covers the benefits structure in detail.
Employee communication is the piece most companies handle poorly. The typical failure mode looks like this: the company finalizes benefits selections, then sends a single email to employees two days before open enrollment closes, explaining that everything is changing and they need to log into a new portal to make their elections. Employees are confused, frustrated, and fielding questions that eat up hours of HR and manager time.
A better approach: communicate in stages. Start with a high-level announcement that you’re transitioning to TriNet and what that means for employees. Follow with a benefits overview that compares current coverage to new options in plain language. Then provide specific enrollment instructions with a clear deadline and a named contact for questions.
If your current benefits are significantly different from what TriNet offers — higher employer contributions, plan types that don’t have a direct equivalent, or supplemental benefits TriNet doesn’t carry — identify those gaps early and prepare talking points. Employees will notice the differences. Being proactive about explaining them is far better than letting employees discover them on their own.
On cost: TriNet’s benefits pricing is typically bundled into per-employee fees, which makes it harder to see the true cost of benefits versus administration versus HR services. If you want a clearer breakdown of how PEO pricing structures work and what to watch for in bundled models, our TriNet PEO cost analysis covers this in detail.
You’ll know this step is complete when every employee has received enrollment instructions, made their elections, and you’ve confirmed those elections are loaded correctly in TriNet’s system before go-live.
Step 4: Complete Payroll Migration and Tax Account Transfers
This is the most operationally sensitive step in the entire onboarding process. Payroll migration and tax account transfers are where errors have real financial consequences, and where delays in one area cascade into delays everywhere else.
TriNet will register as co-employer with relevant state agencies and take over payroll tax filings on your behalf. But getting there requires a coordinated sequence of actions on your end.
Here’s what needs to happen in roughly this order:
1. Run your final payroll with your outgoing provider and confirm the exact cutoff date. Get written confirmation of the final pay period dates so there’s no ambiguity.
2. Collect complete YTD wage and tax data from your outgoing provider. This includes federal and state wages, taxes withheld, employer tax contributions, and benefit deductions for every employee. Verify the numbers against your own records before handing them to TriNet.
3. Set up direct deposit information in TriNet’s system. Every employee’s banking information needs to be entered and verified before the first payroll run. Missing or incorrect banking data is a surprisingly common first-cycle issue.
4. Confirm pay schedules in TriNet’s platform. If you’re changing pay frequency — say, from semi-monthly to bi-weekly — this is the time to communicate that clearly to employees and update your accrual rules accordingly.
Multi-state complexity is worth calling out again here. Each state has different registration timelines and requirements for new employer accounts. Some states process new registrations quickly. Others take weeks. TriNet manages the filings, but if a state registration isn’t complete by your go-live date, payroll for employees in that state may need to be handled differently until it resolves. Ask your implementation manager which states are likely to create delays based on your employee locations.
Workers’ comp transition: TriNet provides master policy coverage, which is one of the genuine advantages of a PEO arrangement. But your EMR and claims history still affect how your account is priced. Have your current workers’ comp documentation ready — policy declarations, loss runs for the past three years if available, and any open claims. For context on how another major PEO handles the workers’ comp audit process, the ADP TotalSource workers’ comp audit guide is a useful reference point.
Before your first payroll runs, do a manual verification check. Pull a sample of five to ten employees across different pay types, states, and benefit elections. Manually calculate what their gross-to-net should look like and compare it to what TriNet’s system shows. This sounds tedious, but it takes an hour and can catch setup errors before they affect an entire payroll run.
Step 5: Configure the TriNet Platform and Train Your Admin Team
TriNet’s platform handles payroll, benefits administration, time tracking, HR document storage, and compliance workflows in one system. It’s capable. But capability only matters if your team knows how to use it.
Platform training is the step that gets treated as optional most often, and it’s the one that creates the most post-go-live friction. Companies that skip admin training spend the first few weeks fielding basic questions from managers and employees that could have been answered in a one-hour walkthrough.
Key setup tasks to complete before go-live:
Admin permissions: Configure who has access to what. Your payroll admin, HR lead, and finance team likely need different permission levels. Set this up intentionally rather than giving everyone full access by default.
HR document storage: Upload your employee handbook, offer letter templates, and any required compliance notices. TriNet’s platform can serve as your central HR document repository, but only if you populate it.
PTO policies and accrual rules: This is where many companies encounter surprises. If your current PTO policy has nuances — different accrual rates by tenure, rollover caps, payout rules on termination — make sure those are configured correctly in TriNet’s system before employees start submitting requests. Our detailed guide on TriNet PEO PTO and policy management covers the specific configuration options and limitations you should know about.
Reporting dashboards: Identify which reports your finance and HR teams will need regularly (payroll summaries, headcount reports, benefits costs) and make sure the right people know how to pull them.
For employees, the TriNet portal is how they’ll access pay stubs, tax documents, benefits information, and personal info updates. Before go-live, send a simple one-page guide explaining how to log in, where to find key information, and who to contact if they have questions. Reducing confusion on day one pays dividends for weeks afterward.
Step 6: Run Your First Payroll Cycle and Audit the Results
Your first payroll with TriNet is a stress test. Treat it that way.
Don’t assume that because TriNet processed the run without errors that everything is correct. Payroll systems can process incorrect data cleanly. The audit is on you.
Here’s what to verify after your first cycle runs:
Gross-to-net calculations: Pull a sample of employees across different pay types — salaried, hourly, commission — and verify that gross pay, deductions, and net pay are calculating correctly. Pay particular attention to employees who had any mid-cycle changes (new hires, salary adjustments, address changes).
Federal and state tax withholdings: Confirm that federal income tax, Social Security, Medicare, and applicable state income taxes are withholding at the correct rates. Remote employees working in states different from your company’s primary location are a common source of errors here. If you need to verify whether TriNet’s payroll meets certified payroll requirements, confirm that before your first run rather than after.
Benefit deductions: Verify that benefit deductions match what employees elected during enrollment. Early or late deduction starts are a frequent first-cycle issue, particularly for employees who enrolled close to the deadline.
401k contributions: Confirm that both employee deferrals and employer match contributions are calculating correctly and that the amounts align with your plan documents.
Garnishments: If any employees have active wage garnishments, verify those are set up and calculating correctly. Garnishment errors create legal exposure, not just payroll headaches.
Common first-cycle issues that show up repeatedly: incorrect state tax setup for remote employees, PTO balances that weren’t migrated from the prior system, and benefit deductions that started a cycle early or late due to enrollment timing.
One important note on escalation: your TriNet implementation manager should still be accessible during your first payroll cycle. Don’t wait until they hand you off to general support before raising issues. If you identify errors after the first run, flag them immediately and get a clear timeline for correction before the second cycle runs.
Your target: two consecutive clean payroll cycles with no manual corrections. That’s the real go-live milestone, not the calendar date.
Step 7: Navigate the Handoff from Implementation to Ongoing Support
After onboarding wraps, TriNet transitions you from your dedicated implementation team to their ongoing account support structure. This is a normal part of the process, but it’s also where service quality can shift noticeably if you’re not prepared for it.
The implementation team is focused on getting you live. Ongoing support is focused on maintaining what’s already running. The responsiveness, familiarity with your account, and proactive communication you experienced during onboarding may not carry over automatically.
Before the handoff happens, get clear answers to these questions:
Who is your ongoing point of contact? Is it a named account manager, or are you moving to a shared support queue? TriNet’s support model has evolved over the years, and the answer to this question matters a lot for how quickly issues get resolved. Our breakdown of TriNet PEO customer support covers what to realistically expect from their ongoing service structure.
What’s the escalation path for urgent issues? If payroll is wrong or a compliance deadline is approaching, who do you call? Get names and direct contact information before your implementation manager moves on.
Are there any service level agreements that apply to response times? If so, get them in writing. If not, understand what “standard” response times look like in practice.
Schedule a 30-day and 90-day internal review after go-live. Compare actual costs, support responsiveness, and platform usability against what was promised during the sales process. Reading through TriNet PEO reviews and complaints from other business owners can help you benchmark your experience against common patterns.
If the onboarding process surfaces issues — rigid benefits that don’t fit your workforce, support responsiveness that falls short, cost surprises that weren’t visible in the original proposal — it’s genuinely better to identify them in month one than in year three. Switching PEOs is easier when you haven’t fully embedded the provider into your HR and payroll infrastructure.
If you find yourself benchmarking TriNet’s service against alternatives after onboarding, our PEO comparisons and PEO alternatives pages provide objective side-by-side analysis to help you evaluate your options without starting from scratch.
Putting It All Together: Your Pre-Onboarding Checklist
TriNet’s onboarding process is structured and repeatable. That works in your favor when you come prepared. The companies that have the smoothest transitions treat onboarding as a project — with clean data, realistic timelines, and proactive employee communication — rather than something that just happens after they sign.
Before you start, make sure you can check off each of these:
☐ Employee census and YTD payroll data gathered and cleaned
☐ Go-live date confirmed with a named implementation manager
☐ Benefits plan options reviewed and employee communication planned
☐ Outgoing payroll provider cutover coordinated and final run date confirmed
☐ Platform admin permissions configured and training scheduled
☐ First payroll audit plan in place before go-live
☐ Post-onboarding review dates on the calendar (30-day and 90-day)
If you’re still weighing whether TriNet is the right PEO for your company, it’s worth looking at how they stack up on pricing, service quality, and flexibility before you commit. Most businesses end up overpaying on PEO arrangements because bundled fees obscure the true cost of individual services. Before you renew your PEO agreement or sign a new one, compare your options — we break down pricing, services, and contract structures so you can make a smarter decision without guesswork.